5.4 KiB
Add ports to a Custom C# node
[!NOTE] To add ports to your node, you must create the C# file for the node. [!includevs-tasks-note-end]
After you create a Custom C# node, add ports to allow the node to send and receive data or trigger other nodes in a Script Graph.
To add ports to a node:
-
[!includeopen-project-window]
-
[!includeopen-existing-external-code]
Add control ports
-
In your external editor, under the class definition for the node, add two public variables: one with a ControlInput type and one with a ControlOutput type.
-
In the
Definitionmethod for the node, use the variables to define the control ports, as shown below:using System; using Unity.VisualScripting; using UnityEngine; public class MyNode : Unit { [DoNotSerialize] // No need to serialize ports. public ControlInput inputTrigger; //Adding the ControlInput port variable [DoNotSerialize] // No need to serialize ports. public ControlOutput outputTrigger;//Adding the ControlOutput port variable. protected override void Definition() { //Making the ControlInput port visible, setting its key and running the anonymous action method to pass the flow to the outputTrigger port. inputTrigger = ControlInput("inputTrigger", (flow) => { return outputTrigger; }); //Making the ControlOutput port visible and setting its key. outputTrigger = ControlOutput("outputTrigger"); } } -
[!includesave-script]
-
[!includereturn-unity]
-
Do one of the following:
- [!includeopen-graph-w-node].
- [!includeff-add-node]
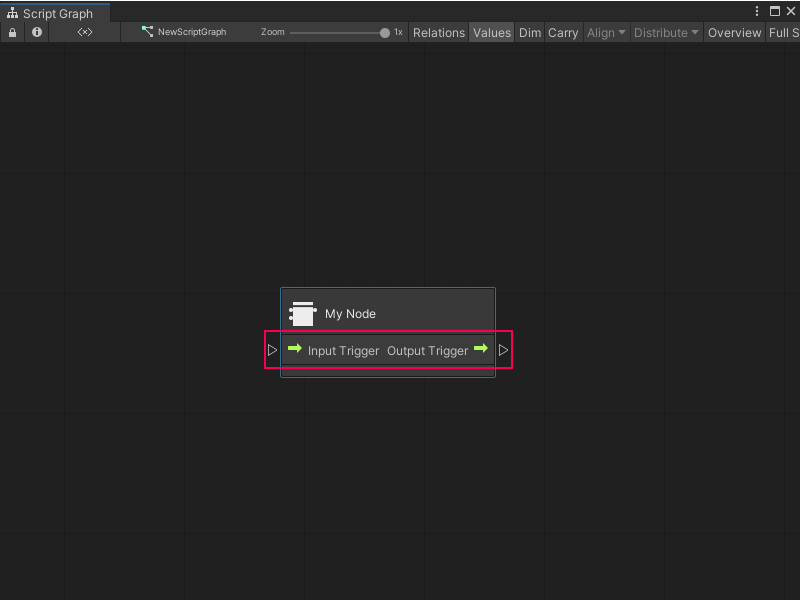
If you used the previous code sample, Visual Scripting adds input and output control ports to the node.
Add value ports
-
In your external editor, under the class definition for the node, add any number of variables with either a Generic or specific type value:
- Generic: The port can receive or output any data type. Corresponds to Unity's Object type.
- Specific Type Value: The port can only receive or output a specific data type. For example,
string,float, orinteger.
For more information on types in Visual Scripting, see Object types.
-
In the
Definitionmethod for the node, use the variables to define the value ports. In the example below, there are two input ports with a type value ofstring, and onestringoutput port:using System; using Unity.VisualScripting; using UnityEngine; public class MyNode : Unit { [DoNotSerialize] public ControlInput inputTrigger; [DoNotSerialize] public ControlOutput outputTrigger; [DoNotSerialize] // No need to serialize ports public ValueInput myValueA; // Adding the ValueInput variable for myValueA [DoNotSerialize] // No need to serialize ports public ValueInput myValueB; // Adding the ValueInput variable for myValueB [DoNotSerialize] // No need to serialize ports public ValueOutput result; // Adding the ValueOutput variable for result private string resultValue; // Adding the string variable for the processed result value protected override void Definition() { inputTrigger = ControlInput("inputTrigger", (flow) => { return outputTrigger; }); outputTrigger = ControlOutput("outputTrigger"); //Making the myValueA input value port visible, setting the port label name to myValueA and setting its default value to Hello. myValueA = ValueInput<string>("myValueA", "Hello "); //Making the myValueB input value port visible, setting the port label name to myValueB and setting its default value to an empty string. myValueB = ValueInput<string>("myValueB", string.Empty); //Making the result output value port visible, setting the port label name to result and setting its default value to the resultValue variable. result = ValueOutput<string>("result", (flow) => { return resultValue; }); } } -
[!includesave-script]
-
[!includereturn-unity]
-
Do one of the following:
- [!includeopen-graph-w-node].
- [!includeff-add-node]
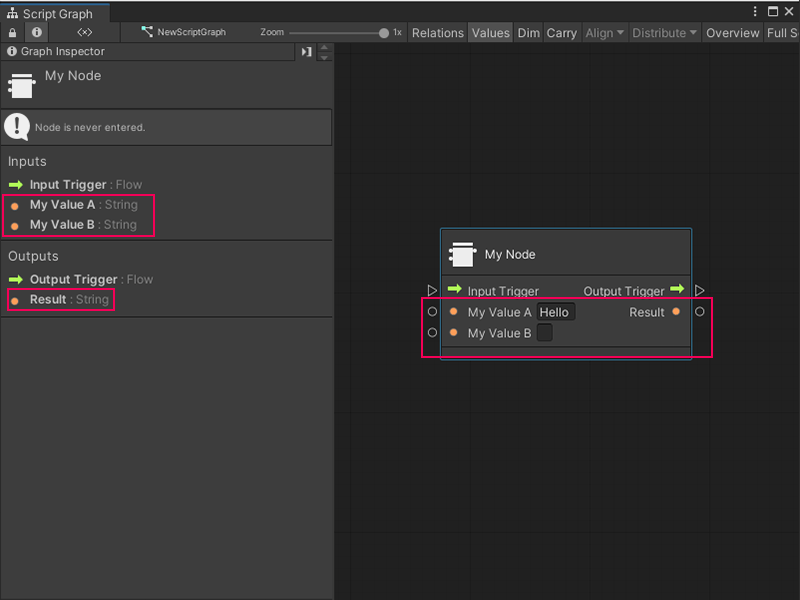
If you used the previous code sample, Visual Scripting adds two input ports, My Value A and My Value B, and one output port, Result to the node.
Next steps
After you add ports to a node, add logic to tell the node what to do with the data it receives.